Hi,
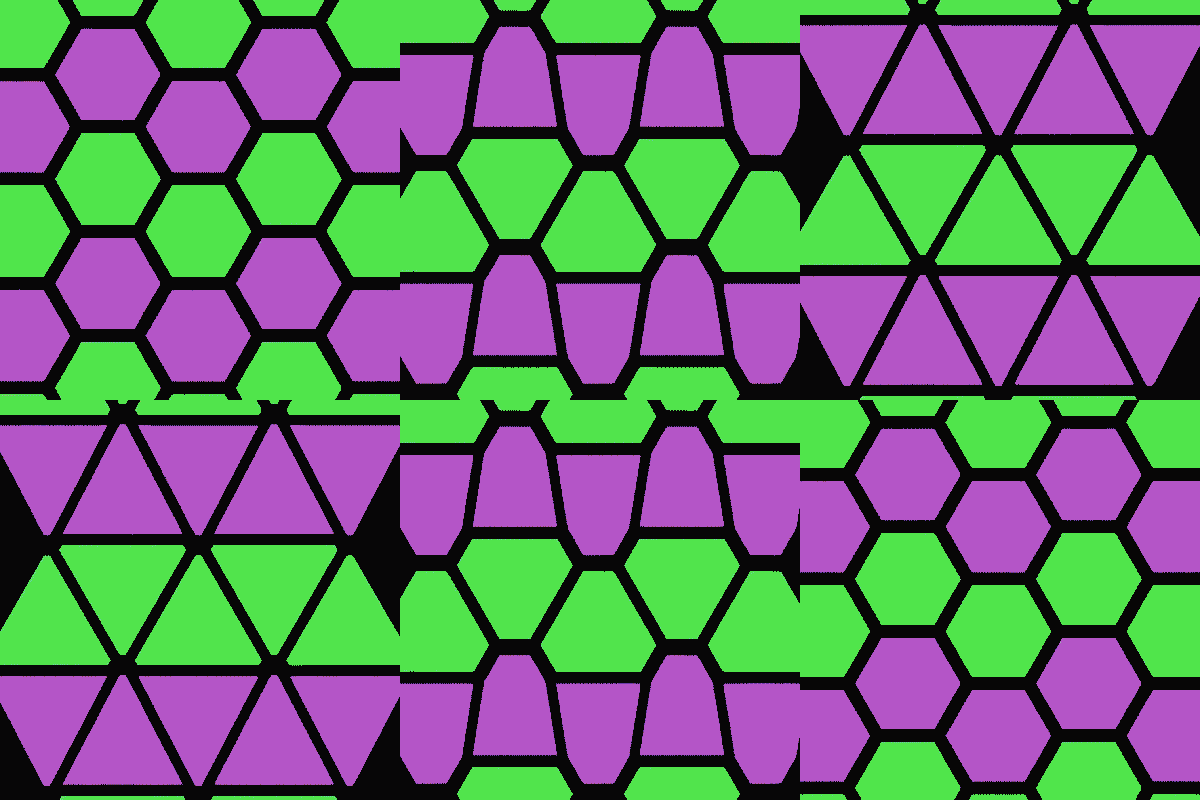
welcome to the last in a series of articles where I discuss technical issues I had to overcome while working on the visuals of my game Syzygy. In this last part, we will tackle various miscellaneous topics that where left out in previous instances: every one of them is structured like a standalone chapter, so feel free to read only the ones you are interested in. Let's start with how the game background works.
Background
The main constraints envisioned for the backgrounds were the following:
These requirements demanded a solution that could potentially have a very large number of variations, but deterministic in nature. I initially thought about using fluid-simulating cellular automata or fractals, but both turned out to be too computationally intensive and poorly controllable.
In the general sense, they also have something else in common: they are physically complex. Complexity in physics is usually defined, quite dramatically, as what stands at the edge between order and chaos.
In more prosaic terms, imagine that you want to classify various systems based on their observation. A system is treated as a black box function W(t) that at a fixed timestep t produces a single value. A system trace is defined as a tuple of the observations (W(0), W(1), W(2), ...). Now, let's consider a few examples and try to classify them:
If we substitute t with our cell coordinates (x,y), you can see we are starting to get somewhere. Now, we know we would like to have a function that produces a complex trace; but if we can't have trace 4, I'd say we should prefer trace 3 to trace 1.
Computers are deterministic in nature so they cannot really produce true randomness: instead, it is possible to build a family of functions, called pseudo-random functions, that behaves a lot like random numbers but are instead deterministic. If you know a little bit about pseudo-random generators, you also know that it is hard to build a good one. In fact, it is very easy to inadvertently introduce some kind of pattern in the sequence of numbers.
But, in our case, this is exactly what we want: if we use a very bad pseudo-random function to generate the background, we obtain a repeating pattern that is diverse enough to be appealing. More precisely, we use this basic structure:
Since the hue and saturation are both defined a priori, we really just need the intensity of our color, so the codomain is [0,1]. We compute the modulo operator because it is one of the simplest and worst ways to obtain a pseudo-random number. The unit_sine function is accountable for the sweeping sea-like motion in the background. To make every background unique, we also apply a different arbitrary function f to the (x,y) coordinates of cells to each one.
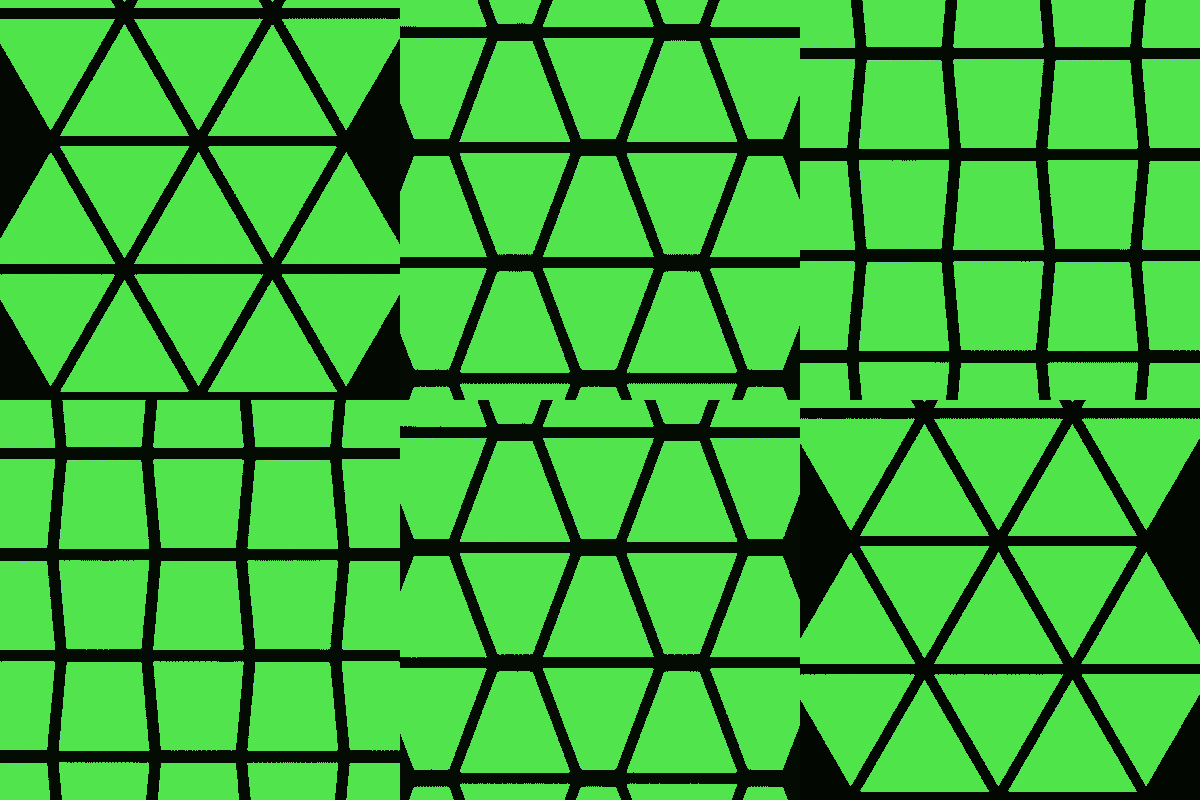
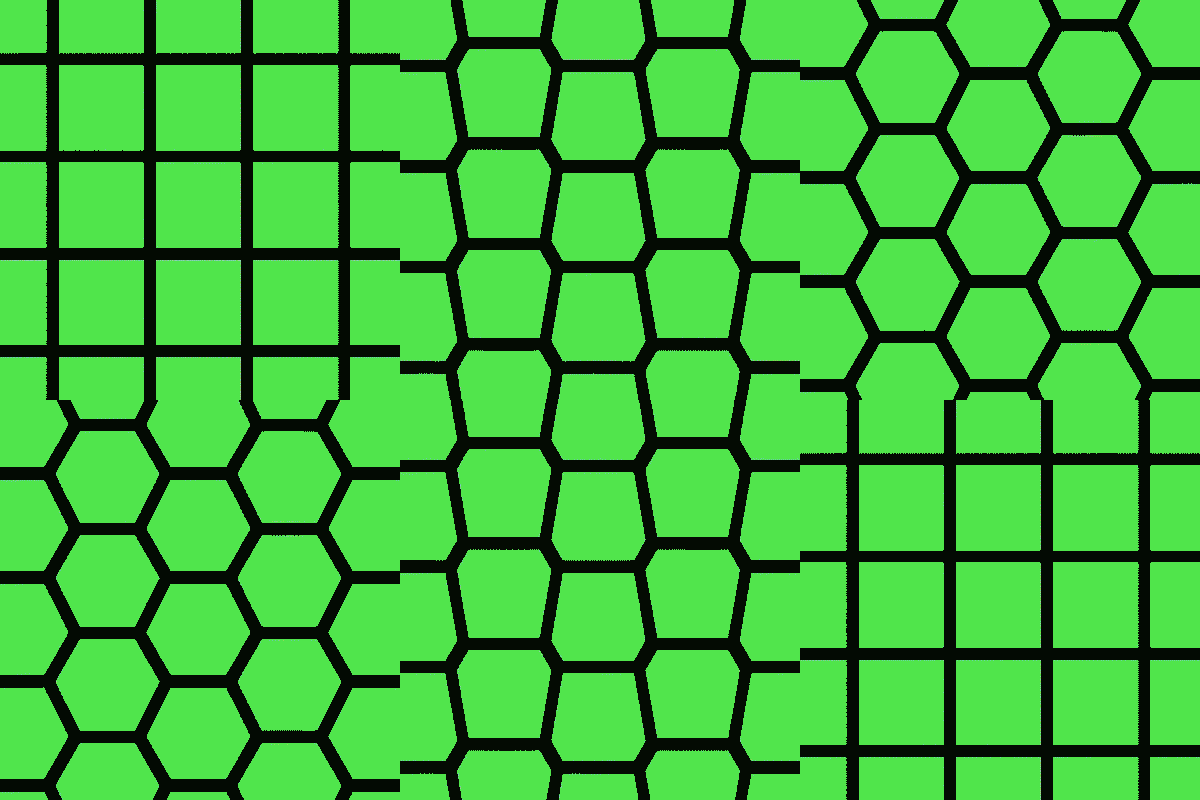
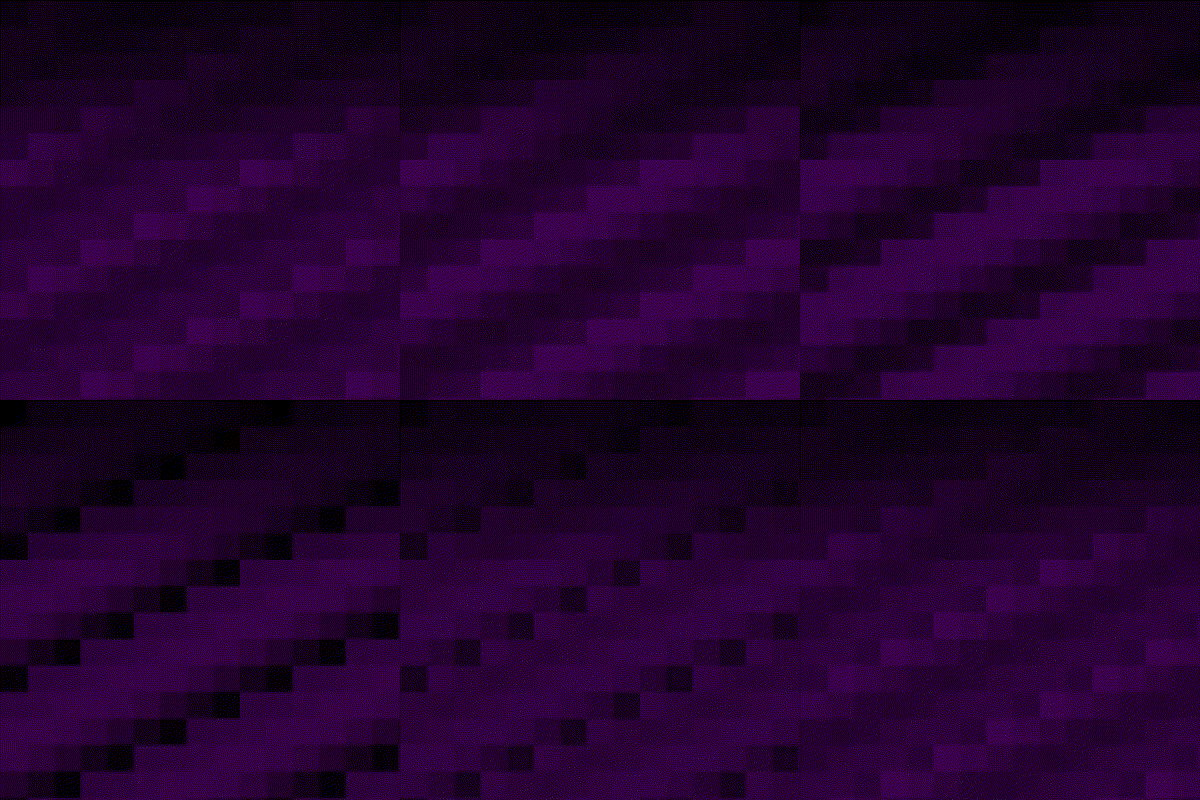
Let's see a couple of examples in action to clarify the whole concept:
More on Tools
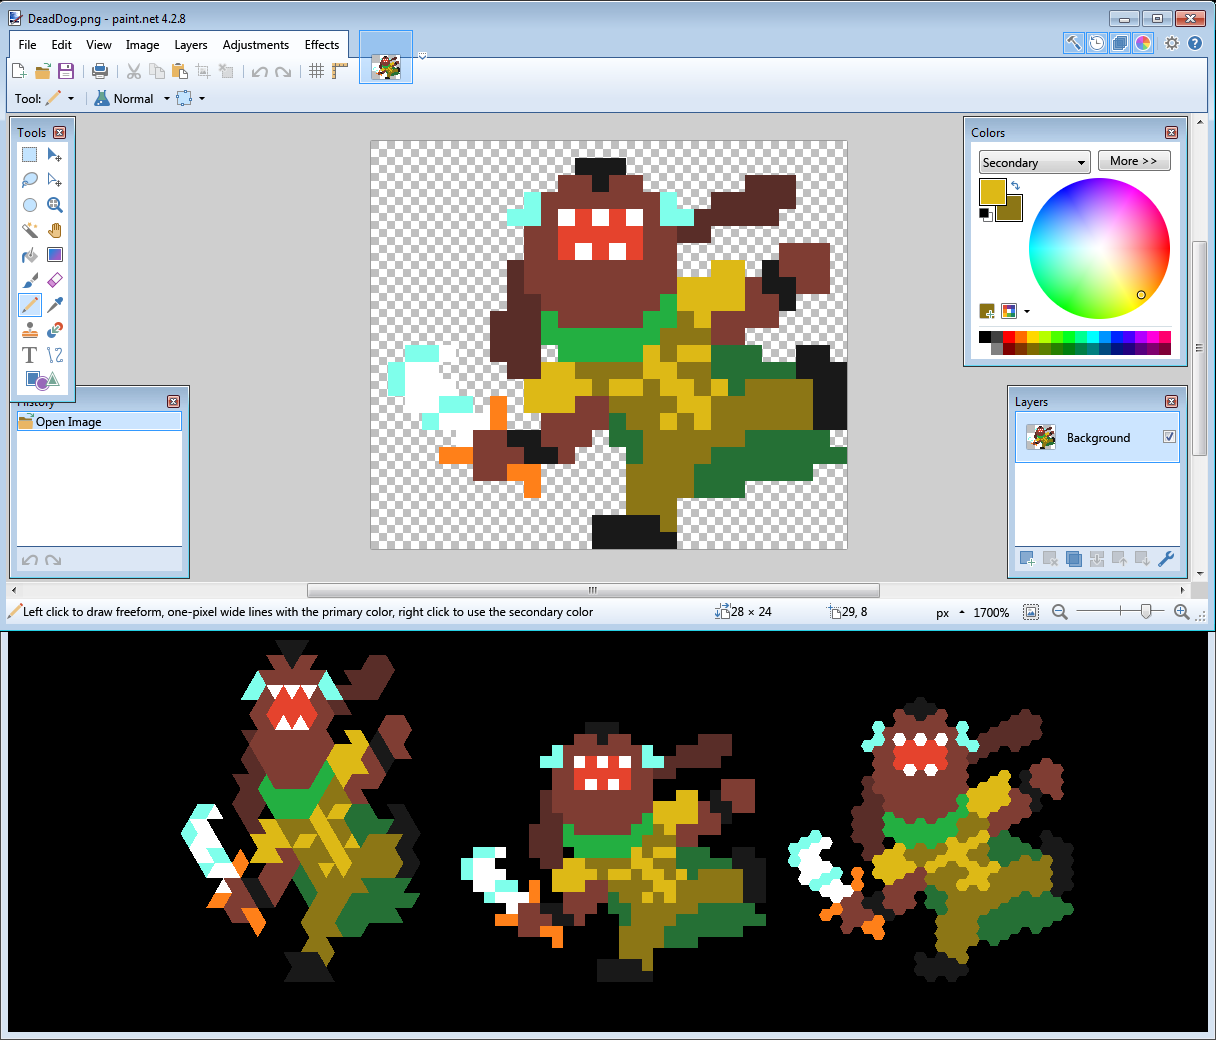
One recurrent notion that became evident during development is how precious tools can be. In part two, I talked about the drawing tool that allowed me to visualize sprites on different shapes at the same time, but I also developed various other small programs that really helped me.
To speed up the level design, I built an pretty standard editor that allowed me to quickly create levels, experimenting with the mechanics without being slowed down by having to edit text files.

The profiler is another pretty standard tool that allowed me to measure function time and optimize accordingly, which is incredibly valuable when trying to get a consistent framerate.
Let's open up a not-so-small side note on framerates. As you may have already noticed in you everyday life, humans tend to be sensible to the derivative of quantities more than to the quantities themselves. Human attention is far more triggered by what changes than by what stays constant.
If you enter in a room filled to the brim with pots, you will certainly notice it and maybe examine the most peculiar ones for some time. But if you stay there for hours or days, you will pay increasingly less attention to them as time goes by, to the point where you won't even realize consciously they are there anymore.
To a certain degree, everyone tends not to notice static objects, constant background noise, persistent smells, etc. So when your framerate drops from 60 to 45 fps (frames-per-second) you notice the game lagging, not because 45 fps are not enough but because you have perceived an alteration in the framerate.
To ensure the most consistent framerate possible, I set up Syzygy to draw at startup a heavy test screen in a hidden window: so heavy, in fact, that it is more computational intensive than the most computational intensive scene in the entire game. By measuring the rendering time for this scene, the game is able to deduce the optimal framerate for the current machine and then run at that framerate from then on.
To verify my assumptions, I recorded the computed framerate in a log file and asked all my testers if the game ever lagged while they where playing. Reasonably, for testers who consistently played at 60 fps the answer was "No". This was also true for people who played at 30 fps.
What I did not expect was that some of my friends with really old machines played the whole game at 15 fps and they all claimed to have never experienced any lag whatsoever.
Certainly, the game's genre contributed to this result: when solving a puzzle you are more concerned with your reasoning than with the game smoothness. Doing the same experiment with an action game might lead to a very different outcome but, still, it seems to me a really valuable piece of information to carry along.
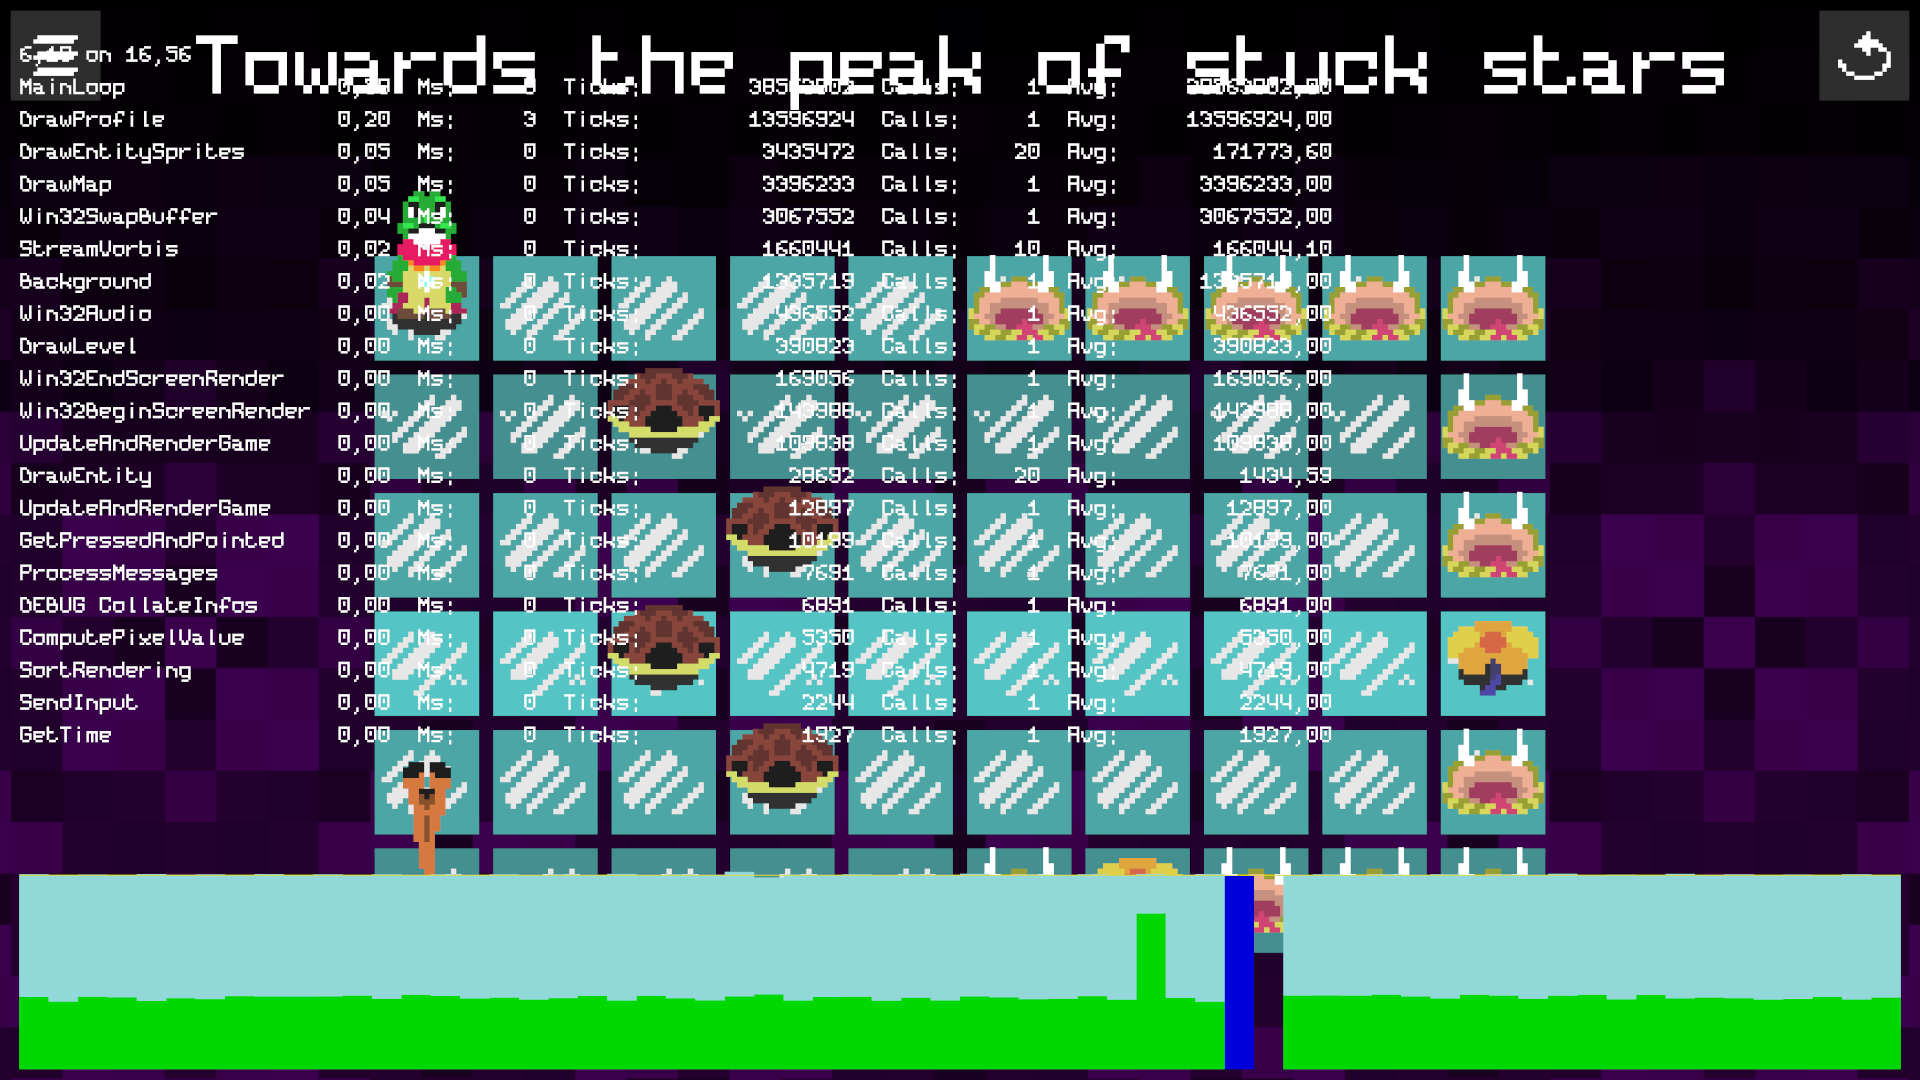
The peak is Windows preparing to take this screenshot.
The last entry on our tour is an incredibly useful program that greatly simplified my testing process: a playthrough recorder. The concept is simple: while the game is running, on every frame, the input data structure is dumped to file along with a few other data like window size and position; then I have these files sent back to me by testers and I can then replay the entire playthrough on my copy of the game at any speed I want.
This is extremely useful because it's almost as good as being side by side with the tester while she is playing; with the added benefit that not being in the same room lifts a lot of the psychological pressure of performing well while being watched.
It's a simple and effective technique to catch bugs and design flaws alike: the caveat is that, at least my implementation, it ended up being somewhat sensible to window resizes and movements, getting to a point where, when the user clicked just at the border of a tile, it worked on her computer but in my replay it didn't. I believe it is a bug related to the Windows API used to set the cursor position, but I didn't take the time to sort it out: forcing the game to be full screen for all testers actually resolved the issue and I assessed it to be a good enough fix for non-shipping code.
Nonetheless, when I'll reimplement the tool for another game, I will not record the input structure directly, but instead use the actual actions performed in the game: I think going up one level of abstraction will provide a more stable solution.
Colorblind Mode
If you remember, in part two we removed outlines from sprites because of their impracticality. At the time, we didn't discuss the consequences of this choice but, if we think about it, not separating different color spots is potentially problematic for colorblind people.
Given the inherent visual nature of the concept, Syzygy is already hopelessly inaccessible for people who are blind, but we can still do something to ensure that everyone with a lesser visual impairment can still enjoy the experience.
Introducing a colorblind mode would have been a reasonable option but, instead, I decided to provide a one-size-fits-all color experience. To better understand the problem, we must first have a little bit of context.
In the human eye, color perception is carried out by a type of cell, called cone, which comes in three flavors; each one reacts differently to certain wavelengths and they are very broadly associated with primary additive colors: red, green or blue. The following picture shows cone sensibility for every type at varying wavelengths:
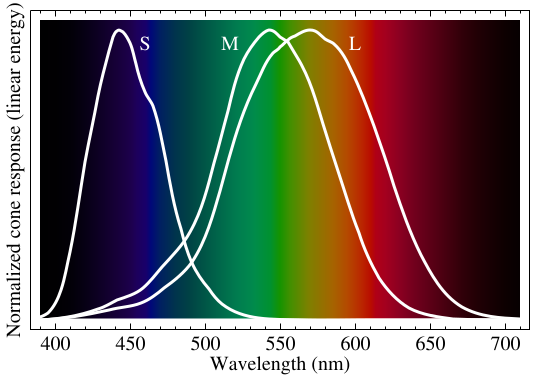
Partial or complete malfunctioning of one or more cone types is one of the causes for color blindness: depending on the damaged cells, different groups of colors tend to be confused. At the extreme, there is achromatopsia: none of the cones work properly and the person affected is sensible only to light intensity, which is perceived by different cells called rods.
From this last biological fact we can deduce that, on a logical level, the minimum subset for color perception is really light intensity. If we can make every color tone used in the game have a unique light intensity then it will be perfectly distinguishable by everyone with a color vision impairment.
This sounds easy when said, but it's actually pretty hard to achieve. I basically spent a very long time tweaking colors to maximize their beauty for people with average color vision, while also turning them to grayscale once in a while to check if they were still distinguishable by someone who didn't see color at all.
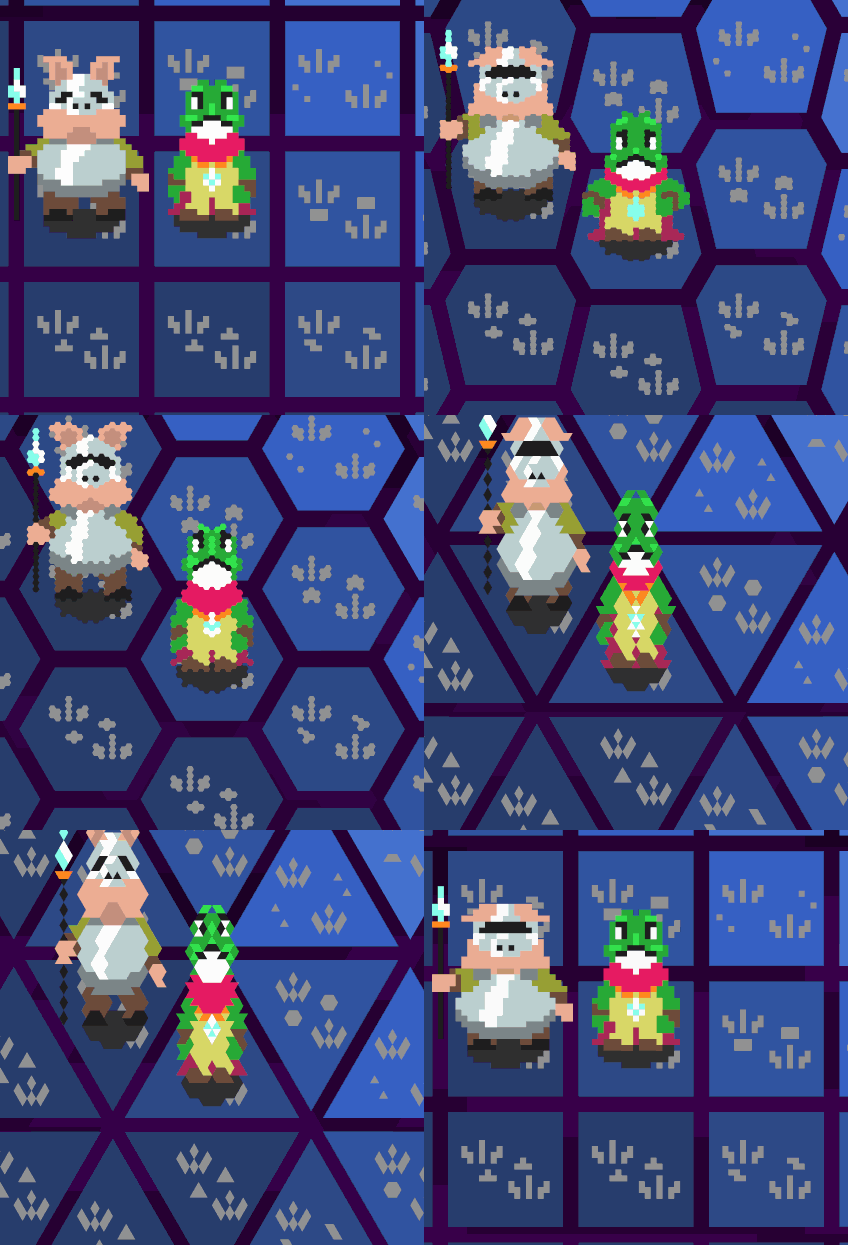
I also strove to never convey any information by color alone, adding other type of markers: one example is that floor tiles of different color have also different patterns on their surfaces.
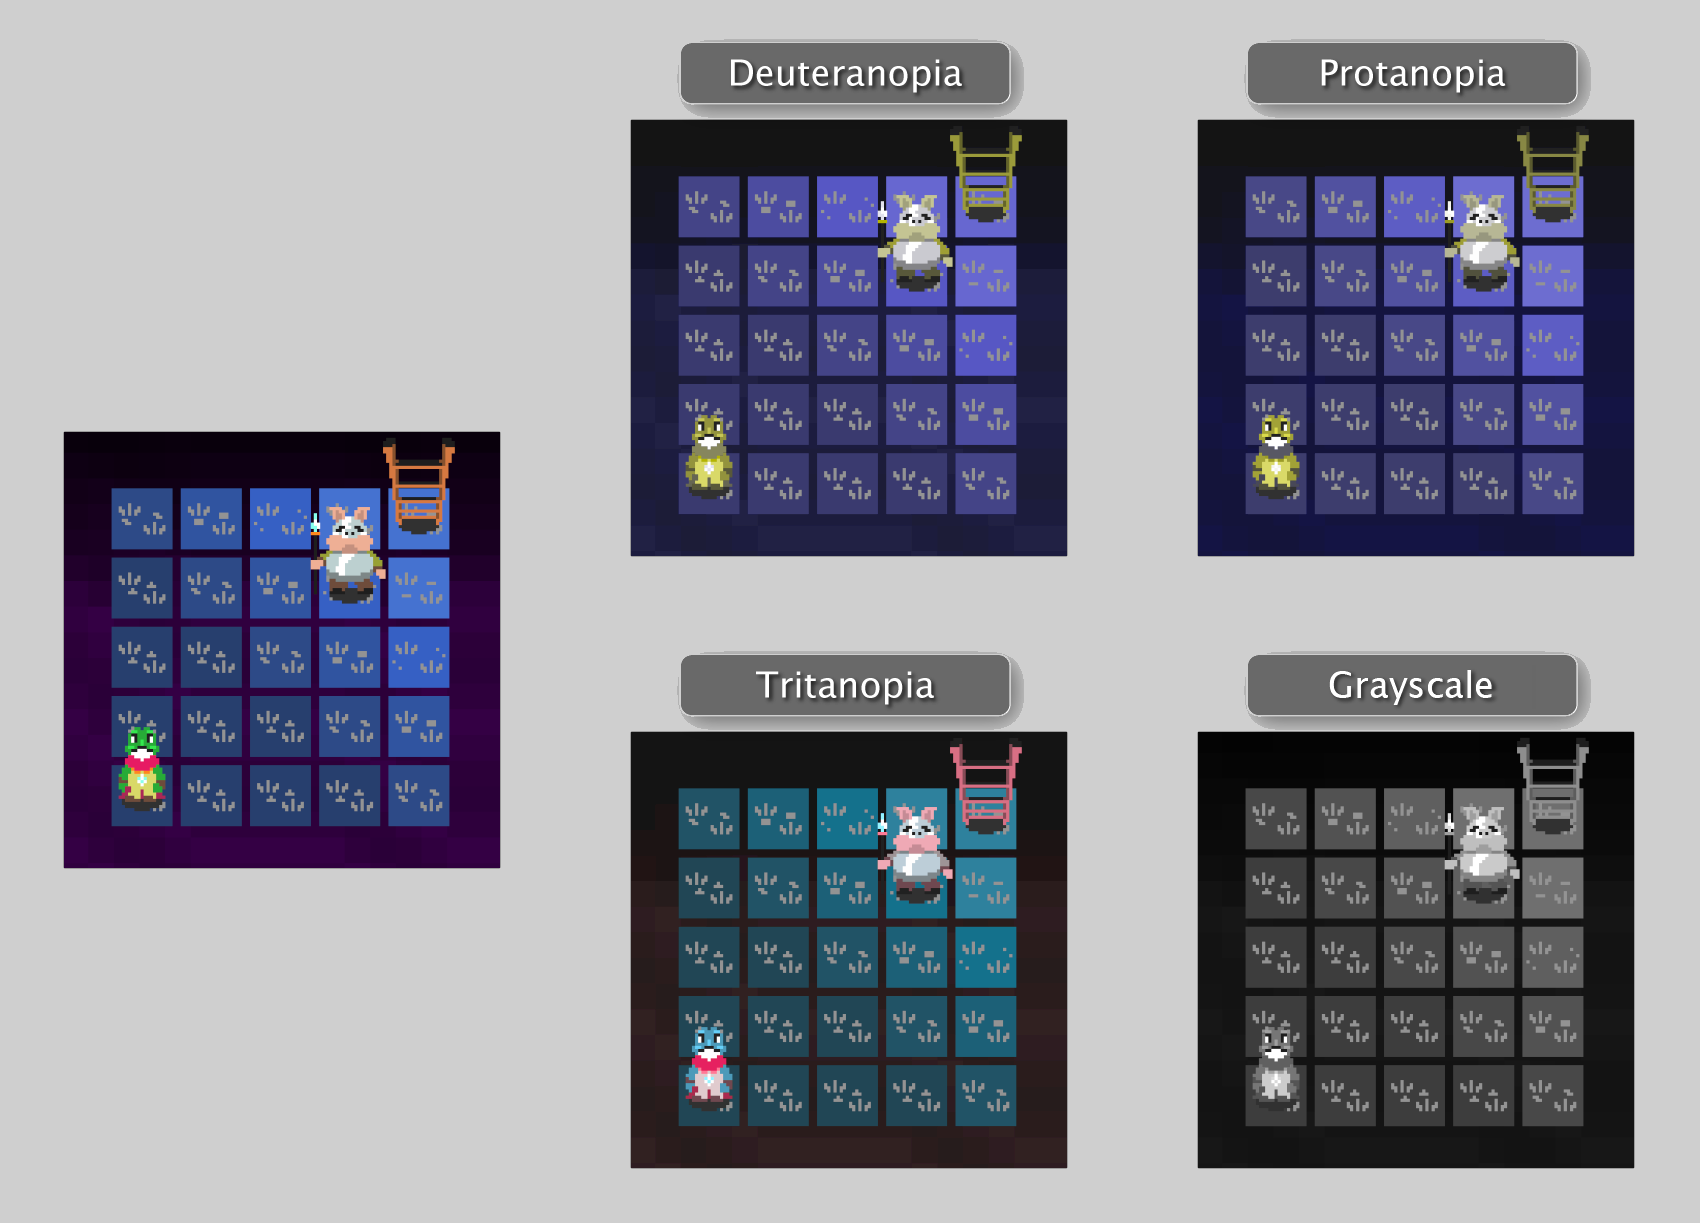
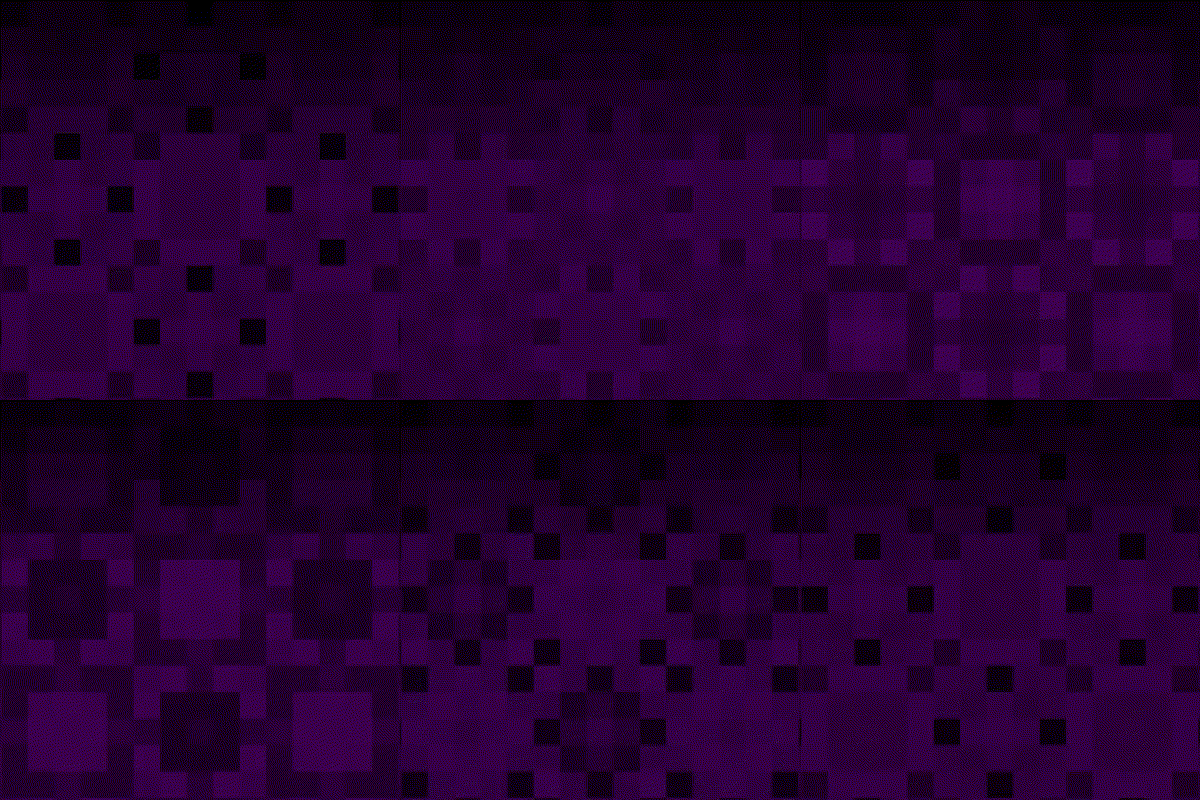
In the following screenshots, I applied various filters to make the picture look as if seen through the eyes of people with different kind of color-blindness: as you can see, the level layout and the contained entities never get mixed up with one another.
In the end, the result was ok: I compromised a little on the color palette while gaining sprites that are almost always unique in terms of light intensity. There are little overlaps here and there, but nothing significant enough to impair the experience.
In retrospective, the activity was extremely time consuming and the outcome not outstanding enough to justify the effort: next time I will probably try to conjure a more automatic process to fix color palettes on the fly.
Resolution Independence
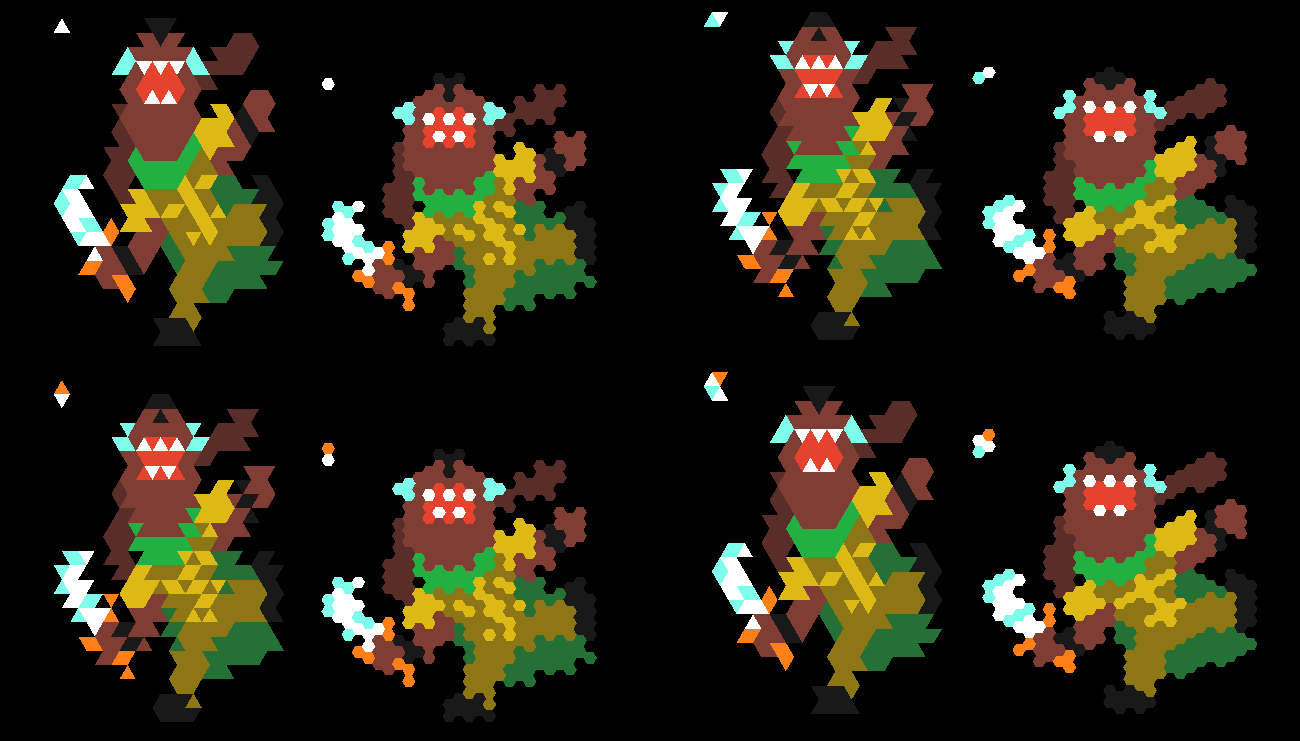
As we saw in part one, everything in Syzygy is a shape and is rendered as such. One nice consequence is freeing the game from the tie of fixed resolution that would trouble a normal pixel art game. Once the shapes are anti-aliased they look good at any resolution.
Add in the fact that the game levels are designed to fit in one screen and you can see why I couldn't resist the temptation to make the whole game dynamically adapt to whatever resolution the user chooses.
Technically speaking, it is not hard to achieve: it is conceptually similar to a web page that has to be seen on a phone as well as on a desktop. Once you have checked the current level size against the screen dimension and resized the level accordingly, you just have to sensibly set the minimum and maximum proportions among elements: tiny text and UI shouldn't be paired up with giant level tiles and sprites.
As web developers have probably known for a long time, it seems very hard to predetermine an algorithm that will resize everything sensibly all the times, so the best course of action is still to optimize the proportions for the most common screen ratios, leaving the really weird ones sub-optimal.
It is very funny and users may not even realize it, but it is possible to play the game in a very tall and thin window or in a very large one and everything in between. A cool side effect is that, with extreme screen ratios, it is possible to see a wider portion of the background, showing some real nice patterns.

We come to the end of our last article on the hardships met while working on the graphics of Syzygy. I thank you again for your time and I hope I have given you something to stir your mind.
I am also planning to write a companion piece on the sound programming of Syzygy so, if that might interest you, stay tuned and I'll try to quench your curiosity.
welcome to the last in a series of articles where I discuss technical issues I had to overcome while working on the visuals of my game Syzygy. In this last part, we will tackle various miscellaneous topics that where left out in previous instances: every one of them is structured like a standalone chapter, so feel free to read only the ones you are interested in. Let's start with how the game background works.
Background
The main constraints envisioned for the backgrounds were the following:
- to be filled by procedural patterns defined as functions that take the position of a cell and return a color value;
- to have a unique one for every level;
- to look like a sea.
These requirements demanded a solution that could potentially have a very large number of variations, but deterministic in nature. I initially thought about using fluid-simulating cellular automata or fractals, but both turned out to be too computationally intensive and poorly controllable.
In the general sense, they also have something else in common: they are physically complex. Complexity in physics is usually defined, quite dramatically, as what stands at the edge between order and chaos.
In more prosaic terms, imagine that you want to classify various systems based on their observation. A system is treated as a black box function W(t) that at a fixed timestep t produces a single value. A system trace is defined as a tuple of the observations (W(0), W(1), W(2), ...). Now, let's consider a few examples and try to classify them:
- (1, 1, 1, 1, 1, ...) is an extremely ordered trace; it is always constant and can be trivially described;
- (1, 2, 1, 2, 1, ...) is also an ordered trace, because it can be easily described as alternating ones and twos;
- (68, 87, 12, 73, 44, ...) is instead a chaotic trace; the numbers contained are completely random, there is no unifying way to describe them;
- (1, 0, -1, 0, 5, ...) may be considered a complex trace; the pattern is somewhat perceivable but it is hard to grasp.
If we substitute t with our cell coordinates (x,y), you can see we are starting to get somewhere. Now, we know we would like to have a function that produces a complex trace; but if we can't have trace 4, I'd say we should prefer trace 3 to trace 1.
Computers are deterministic in nature so they cannot really produce true randomness: instead, it is possible to build a family of functions, called pseudo-random functions, that behaves a lot like random numbers but are instead deterministic. If you know a little bit about pseudo-random generators, you also know that it is hard to build a good one. In fact, it is very easy to inadvertently introduce some kind of pattern in the sequence of numbers.
But, in our case, this is exactly what we want: if we use a very bad pseudo-random function to generate the background, we obtain a repeating pattern that is diverse enough to be appealing. More precisely, we use this basic structure:
W(x,y,t,modulus) := 0.5 * ((f(x,y) mod modulus) / (modulus - 1))
+ 0.5 * unit_sine(t)
+ 0.5 * unit_sine(t)
Since the hue and saturation are both defined a priori, we really just need the intensity of our color, so the codomain is [0,1]. We compute the modulo operator because it is one of the simplest and worst ways to obtain a pseudo-random number. The unit_sine function is accountable for the sweeping sea-like motion in the background. To make every background unique, we also apply a different arbitrary function f to the (x,y) coordinates of cells to each one.
Let's see a couple of examples in action to clarify the whole concept:
f(x,y) = x^2 + y^2

f(x,y) = x + 2 * y

More on Tools
One recurrent notion that became evident during development is how precious tools can be. In part two, I talked about the drawing tool that allowed me to visualize sprites on different shapes at the same time, but I also developed various other small programs that really helped me.
To speed up the level design, I built an pretty standard editor that allowed me to quickly create levels, experimenting with the mechanics without being slowed down by having to edit text files.

The profiler is another pretty standard tool that allowed me to measure function time and optimize accordingly, which is incredibly valuable when trying to get a consistent framerate.
Let's open up a not-so-small side note on framerates. As you may have already noticed in you everyday life, humans tend to be sensible to the derivative of quantities more than to the quantities themselves. Human attention is far more triggered by what changes than by what stays constant.
If you enter in a room filled to the brim with pots, you will certainly notice it and maybe examine the most peculiar ones for some time. But if you stay there for hours or days, you will pay increasingly less attention to them as time goes by, to the point where you won't even realize consciously they are there anymore.
To a certain degree, everyone tends not to notice static objects, constant background noise, persistent smells, etc. So when your framerate drops from 60 to 45 fps (frames-per-second) you notice the game lagging, not because 45 fps are not enough but because you have perceived an alteration in the framerate.
To ensure the most consistent framerate possible, I set up Syzygy to draw at startup a heavy test screen in a hidden window: so heavy, in fact, that it is more computational intensive than the most computational intensive scene in the entire game. By measuring the rendering time for this scene, the game is able to deduce the optimal framerate for the current machine and then run at that framerate from then on.
To verify my assumptions, I recorded the computed framerate in a log file and asked all my testers if the game ever lagged while they where playing. Reasonably, for testers who consistently played at 60 fps the answer was "No". This was also true for people who played at 30 fps.
What I did not expect was that some of my friends with really old machines played the whole game at 15 fps and they all claimed to have never experienced any lag whatsoever.
Certainly, the game's genre contributed to this result: when solving a puzzle you are more concerned with your reasoning than with the game smoothness. Doing the same experiment with an action game might lead to a very different outcome but, still, it seems to me a really valuable piece of information to carry along.

The peak is Windows preparing to take this screenshot.
The last entry on our tour is an incredibly useful program that greatly simplified my testing process: a playthrough recorder. The concept is simple: while the game is running, on every frame, the input data structure is dumped to file along with a few other data like window size and position; then I have these files sent back to me by testers and I can then replay the entire playthrough on my copy of the game at any speed I want.
This is extremely useful because it's almost as good as being side by side with the tester while she is playing; with the added benefit that not being in the same room lifts a lot of the psychological pressure of performing well while being watched.
It's a simple and effective technique to catch bugs and design flaws alike: the caveat is that, at least my implementation, it ended up being somewhat sensible to window resizes and movements, getting to a point where, when the user clicked just at the border of a tile, it worked on her computer but in my replay it didn't. I believe it is a bug related to the Windows API used to set the cursor position, but I didn't take the time to sort it out: forcing the game to be full screen for all testers actually resolved the issue and I assessed it to be a good enough fix for non-shipping code.
Nonetheless, when I'll reimplement the tool for another game, I will not record the input structure directly, but instead use the actual actions performed in the game: I think going up one level of abstraction will provide a more stable solution.
Colorblind Mode
If you remember, in part two we removed outlines from sprites because of their impracticality. At the time, we didn't discuss the consequences of this choice but, if we think about it, not separating different color spots is potentially problematic for colorblind people.
Given the inherent visual nature of the concept, Syzygy is already hopelessly inaccessible for people who are blind, but we can still do something to ensure that everyone with a lesser visual impairment can still enjoy the experience.
Introducing a colorblind mode would have been a reasonable option but, instead, I decided to provide a one-size-fits-all color experience. To better understand the problem, we must first have a little bit of context.
In the human eye, color perception is carried out by a type of cell, called cone, which comes in three flavors; each one reacts differently to certain wavelengths and they are very broadly associated with primary additive colors: red, green or blue. The following picture shows cone sensibility for every type at varying wavelengths:

Partial or complete malfunctioning of one or more cone types is one of the causes for color blindness: depending on the damaged cells, different groups of colors tend to be confused. At the extreme, there is achromatopsia: none of the cones work properly and the person affected is sensible only to light intensity, which is perceived by different cells called rods.
From this last biological fact we can deduce that, on a logical level, the minimum subset for color perception is really light intensity. If we can make every color tone used in the game have a unique light intensity then it will be perfectly distinguishable by everyone with a color vision impairment.
This sounds easy when said, but it's actually pretty hard to achieve. I basically spent a very long time tweaking colors to maximize their beauty for people with average color vision, while also turning them to grayscale once in a while to check if they were still distinguishable by someone who didn't see color at all.
I also strove to never convey any information by color alone, adding other type of markers: one example is that floor tiles of different color have also different patterns on their surfaces.
In the following screenshots, I applied various filters to make the picture look as if seen through the eyes of people with different kind of color-blindness: as you can see, the level layout and the contained entities never get mixed up with one another.
In the end, the result was ok: I compromised a little on the color palette while gaining sprites that are almost always unique in terms of light intensity. There are little overlaps here and there, but nothing significant enough to impair the experience.
In retrospective, the activity was extremely time consuming and the outcome not outstanding enough to justify the effort: next time I will probably try to conjure a more automatic process to fix color palettes on the fly.
Resolution Independence
As we saw in part one, everything in Syzygy is a shape and is rendered as such. One nice consequence is freeing the game from the tie of fixed resolution that would trouble a normal pixel art game. Once the shapes are anti-aliased they look good at any resolution.
Add in the fact that the game levels are designed to fit in one screen and you can see why I couldn't resist the temptation to make the whole game dynamically adapt to whatever resolution the user chooses.
Technically speaking, it is not hard to achieve: it is conceptually similar to a web page that has to be seen on a phone as well as on a desktop. Once you have checked the current level size against the screen dimension and resized the level accordingly, you just have to sensibly set the minimum and maximum proportions among elements: tiny text and UI shouldn't be paired up with giant level tiles and sprites.
As web developers have probably known for a long time, it seems very hard to predetermine an algorithm that will resize everything sensibly all the times, so the best course of action is still to optimize the proportions for the most common screen ratios, leaving the really weird ones sub-optimal.
It is very funny and users may not even realize it, but it is possible to play the game in a very tall and thin window or in a very large one and everything in between. A cool side effect is that, with extreme screen ratios, it is possible to see a wider portion of the background, showing some real nice patterns.

We come to the end of our last article on the hardships met while working on the graphics of Syzygy. I thank you again for your time and I hope I have given you something to stir your mind.
I am also planning to write a companion piece on the sound programming of Syzygy so, if that might interest you, stay tuned and I'll try to quench your curiosity.
